Mint Iced Coffee

20140429-155729.jpg

Hi all! Wow, what a beautiful spring we’re having! Spring puts me in the mood for refreshing, light types of food, and when I saw this iced coffee on Instagram, I was immediately intrigued. Aside from the chocolate/mint combination, I had never heard of mint in coffee. I was really curious about how it would taste, so I tried the recipe. Oh my goodness. I had this early in the day, and had some plain hot coffee later (because some days you need it) and it tasted so…boring.

20140611-115807-43087650.jpg
Using fresh mint syrup instead of store bought mint syrup or mint extract is important because fresh mint has an earthy flavor and the vanilla bean makes your coffee taste a bit like ice cream. This is synergy; when the output is more than the sum of it’s parts; that’s what this is…a new flavor all together. The next day I had another one. And the day after that.

20140611-120524-43524227.jpg
Strong coffee is key to this, because weak coffee can’t stand up to the mint. If you don’t have enough time for cold press, just make some really strong coffee. I use a french press but any super strong coffee is fine. The fresh mint is steeped overnight in a sweet vanilla syrup, and ends up making anything dairy taste like mint I’ve cream. Seriously. Excuse me while I go guzzle some.

Fresh Mint Iced Coffee

Recipe from How Sweet It Is

Cold Brew

1/2 cup freshly ground coffee
2 cups cold water

Mint syrup

1 cup water
1 cup sugar
1 big bunch of fresh mint leaves (around 3/4 cup)
1 vanilla bean, seeds scraped or 1/2 tsp pure vanilla extract

Formula

Ice
2 1/2-3 tbsp fresh mint syrup
8 ounces cold brew coffee
3 tbsp milk or cream

Directions:

To make cold brew, combine the coffee grounds and room temperature water in a glass jar or container. Let sit at room temperature 8 hours to overnight.

Using a fine mesh strainer, coffee filter or cheesecloth, strain grounds from coffee. Store coffee in refrigerator.

Combine water, mint leaves and vanilla bean pod plus seeds (if using) in saucepan over medium heat. Stir constantly until mixture comes to a boil; let boil for two minutes. Remove from heat and let cool. Pour into glass container and refrigerate overnight. Strain out mint leaves and vanilla bean pod or leave in to keep flavoring. Store in refrigerator for up to one week.

To make iced coffee, fill a tall glass 1/4-1/3 full of ice. Pour in coffee, syrup and cream; stir.

Yield: 2 iced coffees plus 1 1/2 cups of syrup.

Brown Sugar Strawberry Scones

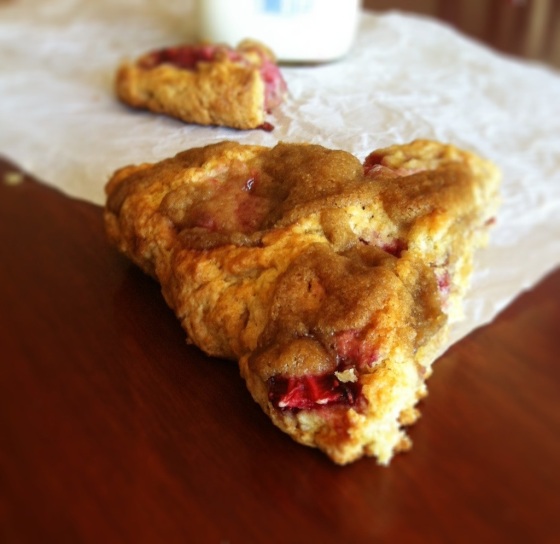
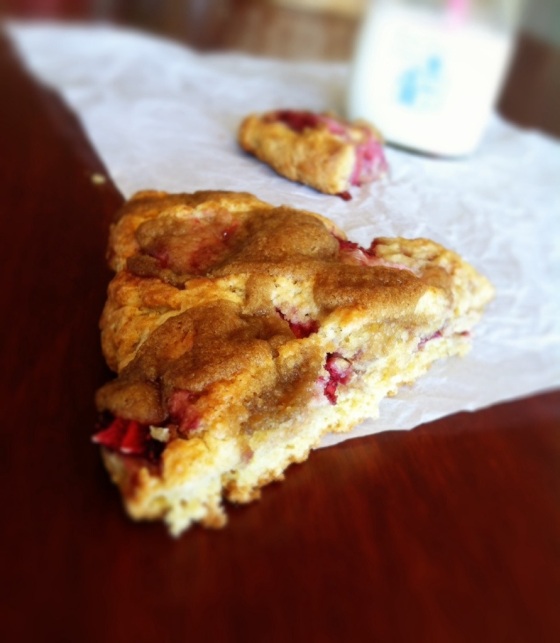
20130912-222017.jpg Hi all! It’s been awhile! I hardly know where to start, so I’ll start with these scones. Back when my mom made these the first time, I remember lying in bed, and waking up and smelling something so tantalizing that I popped out of bed, ran up stairs and had to see what it was. What can I say, I get excited about food. Lo and behold were these scones, still steaming from the oven. I really think what makes them smell and taste so delicious is the combination of sour cream, brown sugar and strawberries.

20131203-125840.jpg Brown sugar, sour cream and berries are a classic combination for a good reason. In these scones, the sour cream keeps them moist and a bit tangy, and the brown sugar topping sinks and forms pockets in the scones as they bake which balances everything. You can really use any fruit you want in these scones, but as I’m partial to strawberries and they work especially well with the brown sugar and sour cream, you should stick to those.

20131207-150529.jpgOn a random side note, these make me quite nostalgic. When I was 10 or so, I made these pancake maple muffins that smelled really similar to these. For an English assignment, I wrote a little story where I made those muffins, and a bear cub was dropped off on our doorstep and he ate them all. I went into quite a lot of detail about the muffins in my story, but what can I say? I love describing food! These scones would really brighten up anyone’s day; so bring a little sunshine to someone’s life this winter.

Brown Sugar Strawberry Scones

Recipe from the kitchn

Scones:

2 cups all-purpose flour
1/4 cup sugar
2 tsp baking powder
1/2 tsp baking soda
1/4 tsp salt
1/2 cup cold unsalted butter, cubed
3/4 cup sour cream
1 large egg
1 tsp vanilla extract
1 cup chopped strawberries (fresh or frozen. If using frozen, do NOT thaw before adding them to the batter.)

Topping:

1/4 cup all-purpose flour
1/4 cup packed brown sugar
3 tbsp butter, softened

Combine flour, sugar, baking powder, baking soda, and salt in a medium bowl. Cut in the butter with a pastry blender or fork, blending until butter is around the size of peas.

Whisk together sour cream, egg, and vanilla. Pour into flour mixture; stir gently until just combined.

Turn dough out onto counter. Pat into a large rectangle and sprinkle half the strawberries over half the dough. Fold the dough onto itself and pat out again into a large rectangle. Sprinkle the remaining strawberries over half the dough and fold it onto itself. Fold the dough once or twice more to combine, being careful not to crush the strawberries.

Transfer to a baking sheet lined with parchment paper or spray with cooking spray. Pat dough into disk about 1 inch thick. Cover and refrigerate for 1 hour to overnight.

30 minutes before baking, preheat oven to 400F. For the topping, combine flour and brown sugar. Stir in butter; it will be paste like.

Crumble topping over dough; slice into 8 wedges. Space wedges evenly, about 2 inches, on baking sheet.

Bake for 18-20 minutes until set and golden brown. Let cool on baking sheet 5 minutes, transfer to wire rack and let cool completely.

Yield: 8 scones

Soft & Thick Snickerdoodles

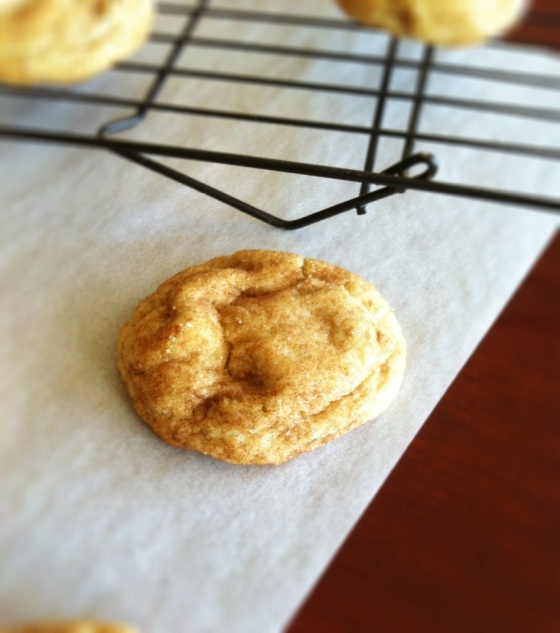
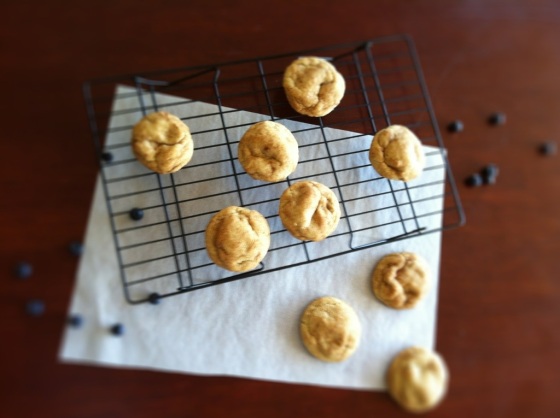
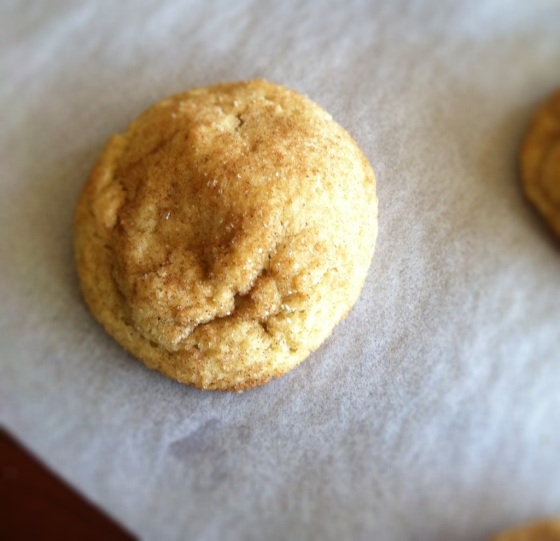
20130812-123903.jpgI cannot deny that my heart has greatly desired this. I have long been searching for the perfect, all butter, thick and fluffy snickerdoodle recipe. And although my browned butter ones are delicious, I wanted one without browned butter, that worked every time. One of the reasons I love this recipe is that you don’t have to chill the dough! Which takes off 30 minutes to 2 hours off of prep. time. Hurray for quick snickerdoodles!!!

20130812-123948.jpg I can’t take credit for the development of this recipe, because Sally at Sally’s Baking Addiction developed it! When I saw her recipe, I was so excited that I might have screamed. No really. My other recipe would not turn out the last few times I made it (without browning the butter) and I wanted them way thicker. I needed a recipe that worked every time, and it had to have what I think is the key ingredient: cream of tartar. As I’ve said before, cream of tartar is what gives these cookies that wonderful tangy taste. Without it, you just have cinnamon sugar cookies, and that is FALSE! Sally solved my thickness problem AND chilling problem by simply adding more flour. I love it when a plan comes together! If you’re looking for a quick, thick, fluffy, all butter, cream of tartar, no fail snickerdoodle recipe, this is it!!

20130812-124742.jpg

Soft & Thick Snickerdoodles

Ingredients

1 cup unsalted butter, softened
1 1/3 cup (9.3oz) granulated sugar
1 large egg
2 tsp vanilla extract
3 cups (15oz) all-purpose flour
2 tsp cream of tartar
1 tsp baking soda
2 1/2 teaspoons ground cinnamon
1/2 tsp salt

Cinnamon Sugar

1/4 cup (1.75oz) granulated sugar
1 tsp cinnamon

Directions

Preheat oven to 375F. Line two large cookie sheets with parchment paper or spray with cooking spray. Set aside.
To make cinnamon sugar: stir together 1/4 cup granulated sugar and 1 tsp cinnamon in small bowl. Set aside.
To make cookies: In large bowl using a stand mixer, cream butter for about 1 minute on medium speed. Add sugar on medium speed until fluffy. Add egg and vanilla. Scrape down sides as needed. Set aside.
In a medium bowl, whisk together flour, cream of tartar, baking soda, and salt. On low speed, slowly add dry ingredients to wet ingredients in 3 different parts. Dough will be thick. Roll dough into 11/2-2 Tbsp balls. Roll balls in cinnamon sugar. Bake cookies on middle oven rack for 8-12 minutes. The cookies will be very puffy and soft. While they’re still warm, lightly press down on them with the back of a spoon to flatten them a bit if needed. Cool on baking sheet for 10 minutes and transfer to a wire rack to cool completely.

Yield: about 2 dozen cookies

Coffee and Donuts Cake

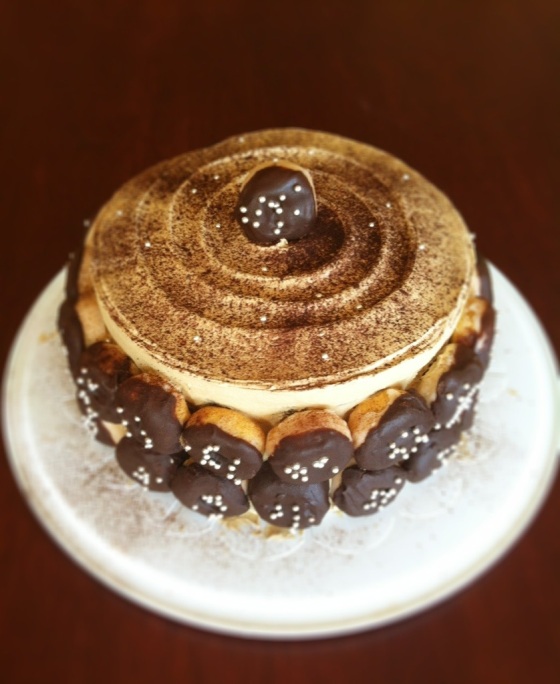
20130702-141232.jpg My Pastor just had a birthday! I never caught how old he was turning, but maybe he likes it that way:) Everybody knows that he’s a regular at starbucks, and that he loves his donuts. So naturally, when I remembered this cake from Sprinkle Bakes, I knew that it would be perfect for him!

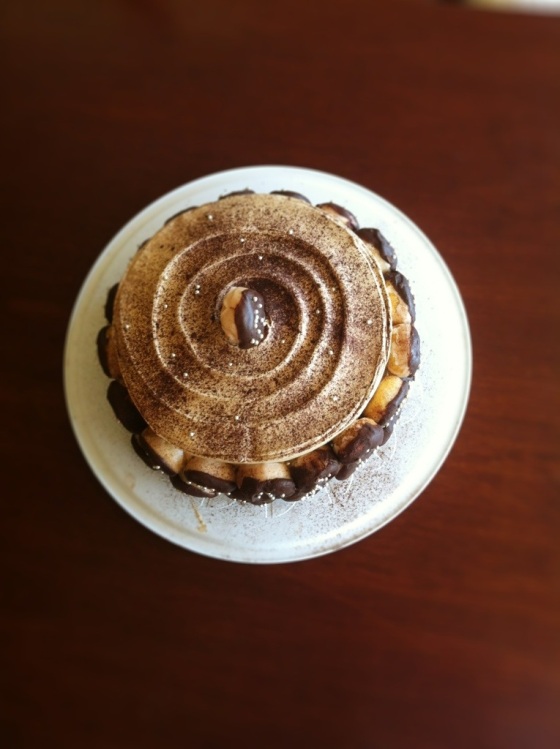
20130702-142235.jpg this cake has three layers of moist, dark chocolate cake, covered in a fluffy coffee buttercream that tastes like homemade coffee ice cream, and it is filled with homemade pastry cream. With chocolate covered donuts pressed into the sides, can you say yum?! My pastor said that it was ‘coffeelicious’…
If you know someone who loves coffee and donuts (who doesn’t?!), you need make this for them!!

Coffee and Donuts Cake

Adapted From Sprinkle Bakes

Cake Layers

3 oz semisweet chocolate, finely chopped
1 1/2 cups hot brewed coffee
3 cups (21oz) granulated sugar
2 1/2 cups (7.5oz) all-purpose flour
1 1/2 cups (4.5oz) unsweetened cocoa powder
2 tsp baking soda
3/4 tsp baking powder
1 1/4 tsp salt
3 large eggs
3/4 cup vegetable oil
1 1/2 cups buttermilk
3/4 tsp vanilla

Preheat oven to 300F. Grease three 9″ round pans with butter. Line bottoms with rounds of parchment paper and grease the paper.

Combine semisweet chocolate with coffee. Let mixture sit, stirring occasionally, until chocolate is melted and mixture is smooth.

In large bowl, sift sugar, flour, cocoa powder, baking soda, baking powder, and salt. In separate large bowl with an electric mixer beat eggs on medium speed until thickened and pale (about 3 minutes). Slowly add oil, buttermilk, vanilla, and melted chocolate mixture to eggs, beating until well combined. Add flour mixture and beat on medium speed until just combined.

Divide batter evenly between pans and bake in middle of oven until toothpick inserted in center comes out clean, 50-60 minutes.

Cool layers completely in pans on wire racks. Run a knife around edges of pans and invert layers onto racks. Remove paper and cool layers completely. Cake layers may be made 1 day ahead and kept, wrapped well in plastic wrap, at room temperature.

Pastry Cream

2 cups half-and-half
1/2 cup (3.5oz) sugar
Pinch salt
5 large egg yolks
3 tbsp cornstarch
4 tbsp (1/2 stick) unsalted butter, cut into 4 pieces
1 1/2 tsp vanilla extract

In medium saucepan, heat half-and-half, 6 tbsp of the sugar and salt over medium heat until simmering.

Meanwhile, whisk together egg yolks in a medium bowl until combined. Whisk in remaining sugar until thoroughly combined. Whisk in cornstarch until pale and creamy, about 20 seconds.

When half-and-half mixture comes to a full simmer, pour 1 cup into egg mixture and whisk vigorously to temper. Pour this mixture back into the saucepan with the remaining half-and-half mixture and whisk to combine.

Heat over medium heat until a few bubbles break the surface and cook, stirring constantly, until it’s thick and glossy; about 30 seconds.

Off heat, whisk in butter and vanilla.

Strain pastry cream through fine mesh sieve into a medium bowl. Cover with plastic wrap, pressing onto surface of cream. Refrigerate for about three hours or until cold and set.

Coffee Frosting

3 sticks plus 2 tbsp unsalted butter, softened
3 cups (12oz) sifted confectioners’ sugar
3 tbsp heavy cream
1 tbsp instant espresso powder
1 tsp pure vanilla extract
pinch of cinnamon
pinch of salt

In small bowl, heat cream and espresso powder until hot; stir to dissolve powder and let cool.

Meanwhile, in the bowl of an electric mixer fitted with the paddle attachment, whip butter for 8 minutes on medium speed. Butter will be pale and creamy.

Add remaining ingredients and mix on low speed for 1 minute, then medium speed for 6 minutes. Frosting will be very light.

Donuts

6 oz semisweet or bittersweet chocolate, chopped
1 tbsp corn syrup
1/2 cup butter
3 dozen plain mini donuts

Combine first three ingredients in small saucepan over low heat; stir until mixture is melted, remove from heat. Dip top of donuts in glaze, move to wire rack. Immediately sprinkle with pearl non-pareils or white sprinkles.

Assembly

Place first cake layer on serving platter or cake turntable, anchoring it with a bit of buttercream. Top with half of pastry cream, spreading almost to edges but leaving a bit of room. Top with second cake later. Spread with remaining pastry cream and top with third cake layer. Brush crumbs from cake; frost with coffee frosting, using an offset spatula. Press donuts onto side of cake. Save one donut for top; attach a toothpick to the donut and press onto middle of cake top. Garnish with espresso powder and pearl non-pareils or white sprinkles.

Liége Waffles

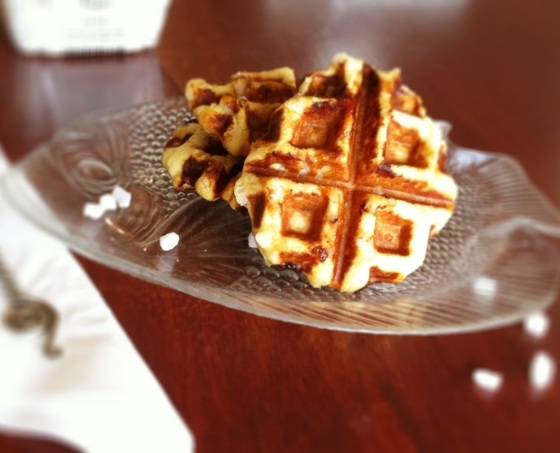
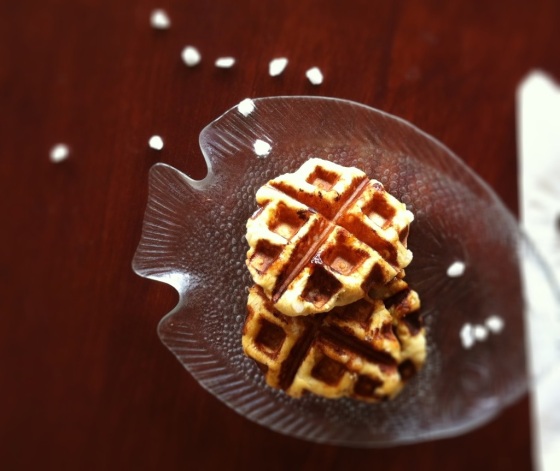
20130623-015332.jpg A.K.A Belgian waffles. I first had this variety of waffle in Costco, and it was warm; I was struck! A yeasted, buttery pastry with caramelized sugar?!?! Oh goodness. It was one of the best things I had ever eaten! Promptly after that, we bought a box and ate them warmed up in the oven. Although they were very tasty, it wasn’t enough for me. I started researching recipes. 20130623-014505.jpg I remembered seeing a recipe for gingerbread liége waffles at bakingdom. Although they sounded delicious, I wanted classic liege waffles. So I took her recipe and tweaked it, taking out the spices and replacing the molasses with honey. They turned out amazing!! The homemade, buttery yeasted dough, with pockets of pearl sugar that had melted and caramelized while it cooked made them exceptional. I’m so glad that I made these, they’re definitely an experience you do not want to miss! 20130623-015213.jpg

Liége Waffles

Ingredients:

1/3 cup milk
1/2 cup unsalted butter
2 eggs
1 tbsp honey
1 tsp vanilla extract
2 cups bread flour
2 tbsp granulated sugar
1 1/4 teaspoon (or 1 packet) instant yeast
1/2 teaspoon salt
3/4 cup pearl sugar

Directions:

In a medium bowl heat milk until hot. Stir butter into milk until melted. Add eggs, whisk to combine. Stir in honey and vanilla; set aside.

In a large bowl, or bowl of a standing mixer with dough hook attachment, combine the flour, sugar, and yeast. With mixer on low speed, slowly add the milk mixture in steady stream. Increase speed to medium and mix until the dough barely sticks to the bowl, about 7 to 8 minutes, scraping the sides as necessary. Transfer dough to a large, greased bowl; cover with plastic wrap. Let rise until doubled in size, about 1 hour.

Once doubled, heat waffle iron. Knead pearl sugar into dough.

Divide the dough into 9 3-ounce pieces. One piece at a time, spread dough in the hot iron. Cook until deep golden brown, about 2 to 3 minutes.

Yield: 9 waffles

Thick and Chewy Chocolate Chip Cookies

20130502-021921.jpg
This recipe and I go way back. When I first got into baking about 3 years ago, I had just started out on weight watchers. I was getting into cooking my own meals to be healthier, and then I discovered my love for baking. Pretty soon I wanted to bake perfect recipes, and I started with the chocolate chip cookie. For months I had tried different recipes, wanting a professional looking, thick and chewy cookie with plenty of chips and lots of flavor. I tried so many recipes: Nestlés, Mrs. Fields, Betty Crocker, Pillsbury, Taste of Home…the works. After much tail and error, I finally found my favorite blog the brown eyed baker, and I it was there that I saw her recipe for the most gorgeous, perfect-looking chocolate chip cookies!

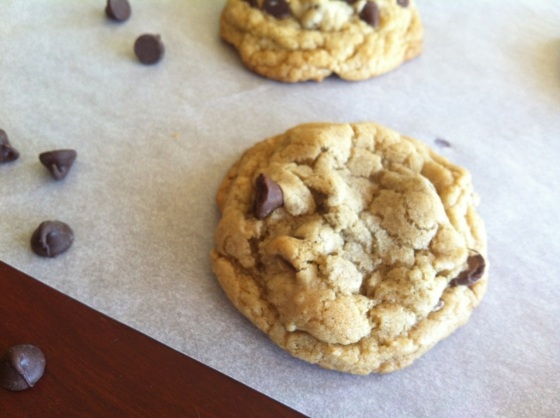
20130506-195118.jpg I soon discovered that they were as good as they looked. I was ecstatic when the cookies came out of my oven, perfect looking, and even happier when I tasted them. Chock full of chocolate chips, caramely,
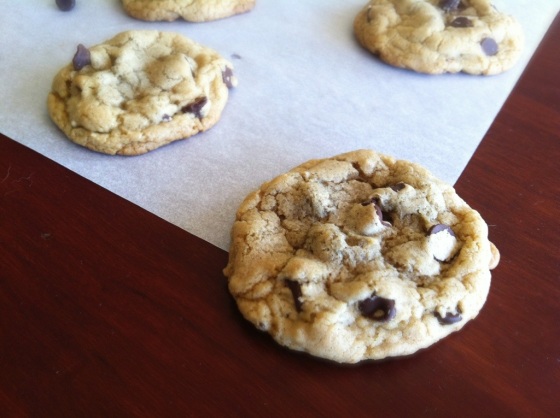
buttery. Thick, soft and chewy with a crackly outer layer. Perfection, if you ask me. The melted butter, egg yolk, and higher ratio of brown sugar to white all contribute to the soft, thick and chewy texture. Leaving them on the cookie sheet after taking them out a bit undercooked lets them continue to bake on the hot sheet, which further insures chewiness. Stacking the dough makes them thicker still. This recipe is very quick: no mixer or chilling required. You may also brown the butter if you wish, but maybe that’s just me:)

20130506-200430.jpg This was also the first recipe that I made from cooks illustrated, and I never turned back! This is my favorite quick chocolate chip cookie recipe; the search is over!

Notes:
You can make these huge (1/4 cup) or regular (2 tbsp) sized. Tearing the dough apart and leaving the rough edges facing up makes a craggily bakery appearance.

Thick and Chewy Chocolate Chip Cookies

Adapted from Cooks Illustrated

Ingredients:

2 cups plus 2 tablespoons (10 5/8 oz) all-purpose flour
1/2 tsp baking soda
1/2 tsp salt
12 tbsp (1 1/2 sticks) unsalted butter, melted and cooled
1 cup (7 oz) packed brown sugar
1/2 cup (3 1/2 oz) sugar
1 large egg plus 1 egg yolk
2 teaspoons vanilla extract
1 1/2-2 cups semisweet chocolate chips

Directions:

Heat oven to 325F. Line 2 baking sheets with parchment paper or spray them with nonstick cooking spray.

Whisk flour, baking soda, and salt together in medium bowl; set aside.

In medium bowl, combine butter and sugars until thoroughly blended. Beat in egg, egg yolk and vanilla until combined. Add dry ingredients and stir just until combined. Stir in chips.

Roll scant 1/4 cup or 2 tbsp of dough into a ball. Pull dough ball apart into two halves; join bases so the jagged surface is facing outwards. Place on prepared baking sheets, jagged surface up, spacing them 2 1/2 inches apart.

Bake on 2 middle racks of oven until cookies edges are brown but centers are puffy (it is important cookies are not all the way done), 15 to 18 minutes (12-15 for smaller cookies), rotating the baking sheets front to back and top to bottom halfway through baking time. Cool cookies on sheets (they will continue to bake on baking sheets).

Yield: 18 large or 24 medium cookies

Blueberry Crumb Scones

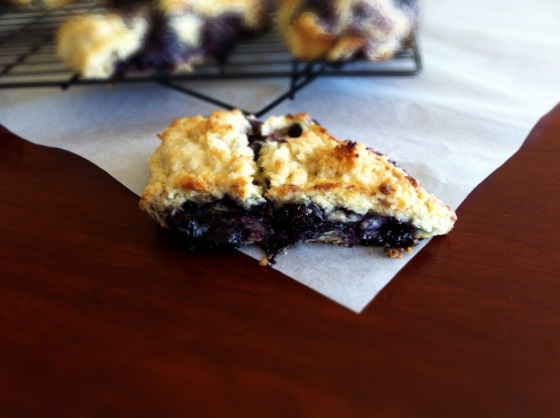
20130428-125734.jpg Scones are of my favorite foods. These scones in particular have a good story behind them. You see, sometimes I have very specific dreams about food (for example these). One night, I dreamt that my sister made some blueberry scones from a King Arthur Flour recipe. They had a crumb topping, and big gooey pockets of blueberries. As you can imagine, after such a vivid and tasty portrayal, I had to recreate them! Unfortunately, I didn’t find any recipe like the one from my dream on King Arthur (although King Arthur Flour has incredible recipes in general). I made ones similar to these ones, only I used the original Cooks Illustrated recipe for blueberry scones and added a light, crunchy crumb topping. These are quite a bit lighter than my dark chocolate strawberry scones, which is only fitting for spring.

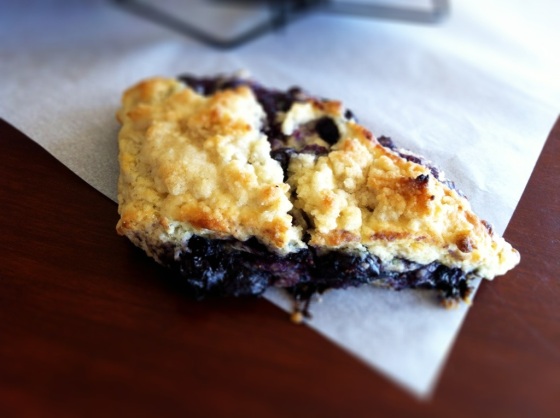
20130429-013856.jpg These are a moist, buttermilk scone with a bit of lemon zest, rolled up like a jelly roll filled with blueberries and topped with a crumb topping. By the time they’re done baking, the blueberries are practically bursting from the scone, having gotten very juicy. The scones are lightly fragranced with lemon, and the crumb topping provides a very nice texture contrast to the blueberries. That’s what I call a dream come true *wink*.

20130429-015420.jpg

Note: for a picture tutorial, visit my chocolate strawberry scones post.

Blueberry Scones

Adapted from Cooks Illustrated

Scones:

8 tbsp. (1 stick) unsalted butter, frozen
1 1/2 cups fresh or frozen blueberries
1/2 cup whole milk
1/2 cup sour cream
2 cups (10 oz) all-purpose flour, plus more for dusting work surface
1/2 cup (2.5 oz) sugar
2 tsp baking powder
1/4 tsp baking soda
1/2 tsp salt
1 tsp finely grated lemon zest
1 tbsp butter, melted

Topping:

1 tbsp butter, melted
2 tbsp all-purpose flour
2 tbsp sugar
Pinch salt

Directions:

Preheat oven to 425F. Grate frozen butter on the holes of a large box grater. If using fresh blueberries, place
in freezer until needed.

Whisk together milk and sour cream in a medium bowl; refrigerate until needed. Combine flour, baking powder, baking soda, salt in a medium mixing bowl. In small bowl, combine sugar and lemon zest and rub zest into sugar until it is moistened. Whisk into flour mixture. Add grated butter to flour mixture and combine.

Add milk mixture; fold with a spatula just until combined. Turn dough out unto floured surface and knead 6-8 times. Roll into a 12-inch square.

Fold dough into thirds like a business letter; lift short ends of dough and fold into thirds again to form a square.

Transfer dough to floured plate and freeze for 5 minutes.

Meanwhile, combine all crumb topping ingredients in a bowl and set aside.

Roll out again into a 12″ square; scatter berries over dough and press down lightly.

Roll dough into cylinder, pressing to form a tight log. Arrange log seam side down and pat into a 12 by 4-inch rectangle. Cut rectangle crosswise into 4 equal pieces.

Cut each rectangle diagonally to form 2 triangles and transfer to baking sheet lined with parchment paper. Brush with melted butter; top with crumb topping.

Bake scones 15-18 minutes or until set; the exterior will be firm, golden, and slightly springy to the touch. Cool scones 1 minute on sheets, then transfer to cooling rack and cool at least 10 minutes before serving.

Yield: 8 scones

Whole Wheat Pancakes

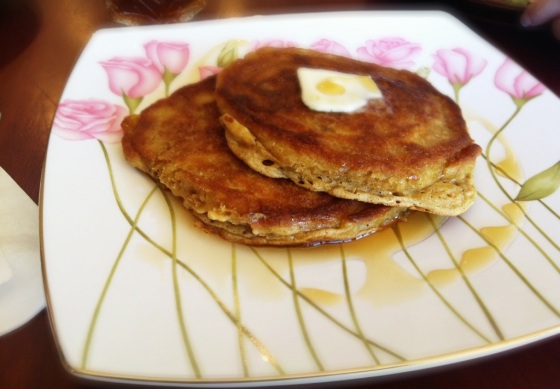
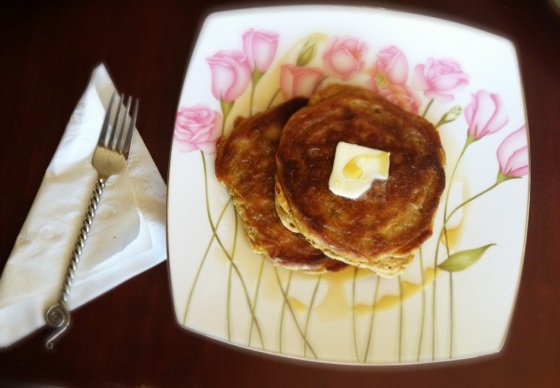
20130418-102028.jpg I love pancakes! I forgot to add that in my about page, but there’s a fundamental fact about me;) But as much as I love them, they don’t love me. When I have them for breakfast they always leave me with this empty feeling in my stomach and let’s face it: they’re not the most nutritional thing on the planet. So I started craving more substantial pancakes; something that would really fill me up. I was craving whole wheat pancakes. So my mom (lovingly) made me the best pancakes I ever had! It’s from my fav buttermilk pancake recipe (from Darigold; I already tried cooks illustrated and these are better:) where the all purpose flour is replaced with whole wheat pastry flour and oats are added for extra heartiness.

20130418-102822.jpg The result is thick, moist pancakes that have a wonderful flavor. She also added vanilla, which is a must! Buttermilk and the oats are what make these pancakes moist, and the whole wheat pastry flour doesn’t weigh it down a bit. I must warn you though: the result wouldn’t be the same if you were to use plain whole wheat flour, as I’m thinking it would make them heavy. Best of all, these fill you up! In truth, these are the best pancakes I have ever had. In my life. And I’ve tried a bazillion recipes! Make these and you won’t be disappointed!

Whole Wheat Pancakes

Adapted from Darigold

Ingredients:

2 cups whole wheat pastry flour
1 cup rolled oats
1 1/4 tsp baking powder
1 tsp salt
2 1/8-1/4 cup buttermilk
1 tsp vanilla
2 large eggs
1/4 cup melted butter

Directions:

Preheat griddle to 350F or skillet on medium-low heat. Combine first four ingredients. In separate bowl combine remaining ingredients; add to dry ingredients and stir just until combined. Mixture will be thick, but if too thick (not spoonable), add more buttermilk. Drop batter by 1/4 cupfuls onto well greased griddle or skillet and spread with spoon if needed. Cook until tops are bubbly and edges are dry. Flip and cook until golden brown.

Yield: About 15 Pancakes

Caramelized White Chocolate Cookies

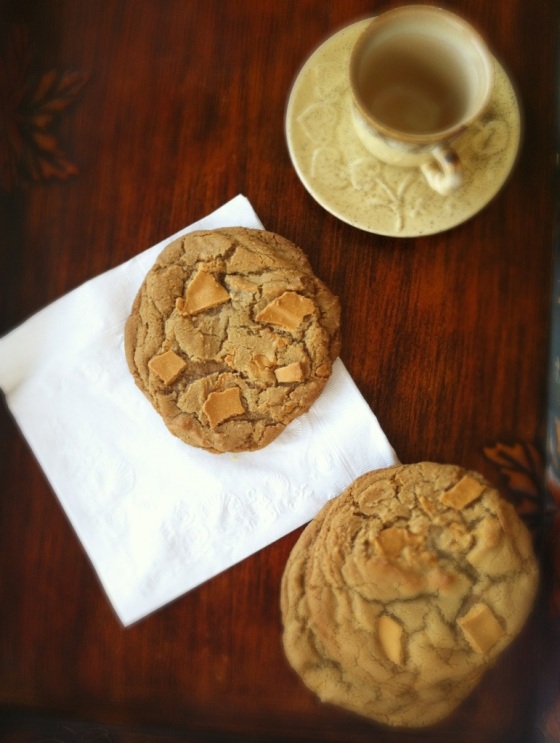
20130415-154047.jpg Have you ever heard of caramelized white chocolate? I was bewildered when I came across it on thelittleloaf! Since I love all things caramelized and I adore white chocolate, this was a must try! Before I get any further, I know it sounds ridiculous. I mean, wouldn’t it seize up? Well yes it does, but you just have to stir it and it smoothes out again. What I did with the finished product was pour it onto some parchment, let it set, broke it into chunks and added it to one of the most amazing cookie doughs I’ve ever had.

20130417-115309.jpg The dough is made from my favorite quick chocolate chip cookie doughs from cooks illustrated that bakes up thick, chewy and professional looking. I made these with all brown sugar for extra caramel flavor, and browned the butter to make it more nutty and add depth of flavor. And because it’s browned butter 🙂 After adding the chunks of caramelized white chocolate it. was. ah-mazing!! Once I baked them (using a method of stacking the dough to make them thicker) they blew my mind. Have you ever had an oatmeal scotchie? You know, those cookies with the oats and butterscotch chips. These are like a more refined version. The caramelized white chocolate adds toastiness and the cookie dough is very caramely and soft.
I know that these look like a lot of work, and they are, but don’t let that deter you! They’re easy peasy if you make the chocolate the day before. You need this experience in your life!

Caramelized White Chocolate Cookies

Adapted from cooks illustrated

Ingredients:

2 cups plus 2 tbsp (10 5/8 oz) unbleached all-purpose flour
1/2 tsp baking soda
1/2 tsp salt
12 tbsp (1 1/2 sticks) butter
1 1/2 cups packed (10 1/2 oz) dark brown sugar
1 large egg plus 1 egg yolk
2 tsp vanilla extract
11 oz white chocolate (I used Ghirardelli chips)

Directions:

To caramelize the white chocolate, place it in a medium skillet over medium-low heat. Stir constantly. When chocolate seizes, take off heat, stir until smooth, and return skillet to burner. Continue this process for about 45 minutes, stirring all the while, until it’s a medium caramel color:

20130417-122800.jpg Pour onto sheet pan lined with parchment paper. Let set and break into chunks.

Preheat oven to 325F. Line a baking sheet with parchment paper; set aside.

In a small saucepan or skillet, heat butter on medium to high heat (depending on how fast you want your butter to brown). After butter begins to foam, stir until it is a golden brown color and smells nutty and wonderful. Take off heat and set aside.

Whisk together flour, baking soda and salt in a medium bowl; set aside.

In the bowl of a standing mixer, beat sugar and browned butter (make sure to add the brown bits) until smooth. Add egg, egg yolk and vanilla and beat until combined. On low, add the flour mixture until just combined. Stir in 1 1/2 cups of the chocolate chunks (you will have some left over).

Using a muffin scoop or a 1/4 cup measuring cup, scoop dough and roll into balls. Tear balls in half, turn ragged edges to face top and bottom and press together:

20130417-124425.jpg Space cookies 2 1/2 inches apart on prepared baking sheet and bake for 12-18 minutes, rotating halfway through baking time, until light golden brown and puffy. Cookies will not appear to be done, but they will continue to bake on cookie sheet. Cool cookies on sheet; remove cookies to counter. Repeat with remaining cookie dough.

Yield: 12-18 cookies

Note: To give them a more professional look, halfway through baking time press
the extra chocolate chunks on top of cookies.

Shortbread cookies (GF)

20130225-132229.jpg
So let’s get down to things: I’m really sick. It’s miserable.
Mostly because of the seizures. Yup…ugh. Ok I’m done sulking:) But seriously, I’m going somewhere with this! Since I’ve been sick (for like EVER!!) I haven’t done a lot of baking. So my sister (beautiful, gorgeous and kind…repetitive?? Nah;) made these for me. Gluten free. Twice. Because they’re so good and my sister is better than yours. (I think I feel more feisty at 3am;)

20130316-032225.jpg
Anyhoo, these cookies are amazing! They’re stable–not too crumbly (a miracle for GF shortbread!), vanilla scented, melt in your mouth, warm your soul cookies. Did I mention that they melt in your mouth?! my favorite part:) Plus, (aside from being gluten free and wonderful) they’re infinitely customizable! Want Linzer cookies? Cut a hole in the middle, sandwich with preserves and top with powdered sugar. Cut outs? Roll with a bit of GF flour and cut away, topping with frosting. Chocolate chip shortbread? Add mini chocolate chips (duh). Chinese almond cookies? Add almond extract and top with an almond. You could even make a version of samoas Girl Scout cookies! Yum. Oh, and of course you could always use all purpose flour and leave out the xanthan gum for a gluten version. Whatever you do, do yourself and someone you love a favor and make these!

GF Shortbread Cookies

Adapted from Argo Cornstarch

Ingredients:

1 cup (2 sticks) butter, softened
1/2 cup brown sugar
1 tsp vanilla extract
2 cups gluten free flour mix (I prefer King Arthur Flour)
1 tsp xanthan gum
1/4 cup corn starch
1 tablespoon sugar

Directions:

Preheat oven to 300ºF.

Mix butter, brown sugar and vanilla using electric mixer until creamy. In medium bowl combine flour, xanthan gum and cornstarch. Add to the sugar mixture on low speed.

Roll into 1-inch balls and place on ungreased baking sheets. Pour tablespoon of sugar on a small plate; dip bottom of drinking glass in sugar and gently press down on each cookie to flatten.

Bake cookies for 25 to 30 minutes, or until bottoms begin to brown.

Cool for 5 minutes on baking sheets, then remove to a wire rack to cool; enjoy with a cup of tea.

Yield: 3 1/2 dozen cookies.

Note: if you want shortbread slices, knead dough until smooth (about 2 min)
and shape into an 8×11″ rectangle. Slice off 2×1″ cookies and bake as directed above.

20130316-035400.jpg